Background

Monday 21 March 2011

Stitched Up!

I made this scrapbook page for a friend of mine for her 50th birthday. Angela made a scrapbook album for her Mum's 80th, so I thought it would be nice if she had a page for herself to remind her of some of our evenings. We and a group of friends meet regularly and have an evening of crafting, usually cross stitch, but some of us will also knit, quilt, do the mending, sew names into uniforms etc - or just put the world to rights lol. We always have a great evening, which also involves some refreshments & chatting too - hence the journalling which highlights some of the activities we enjoy as a group.
Journalling is stained with "Old Paper" distress ink and edged with a brown distress ink.

Both the photos were taken at our Christmas get togethers over the last 2 years, but I didn't want it to be a Christmas themed page, & because Angela is going on a celebratory Caribbean cruise soon, I wanted it to  include bright flowers.
I thought this was the ideal title for the page since it reflects how we all first met.
I cross stitched the title, then using backstitch, stitched it onto the page.
I used a sew easy tool to indent holes to sew through. I joined 2 different papers together, and I picked out 2 contrasting colours from the papers to tie the whole page together. (I love the brown Quick Quotes paper - it looks like the flowers on it are embossed)
I stitched around the outside of the flowers for added interest and to draw the page together further.
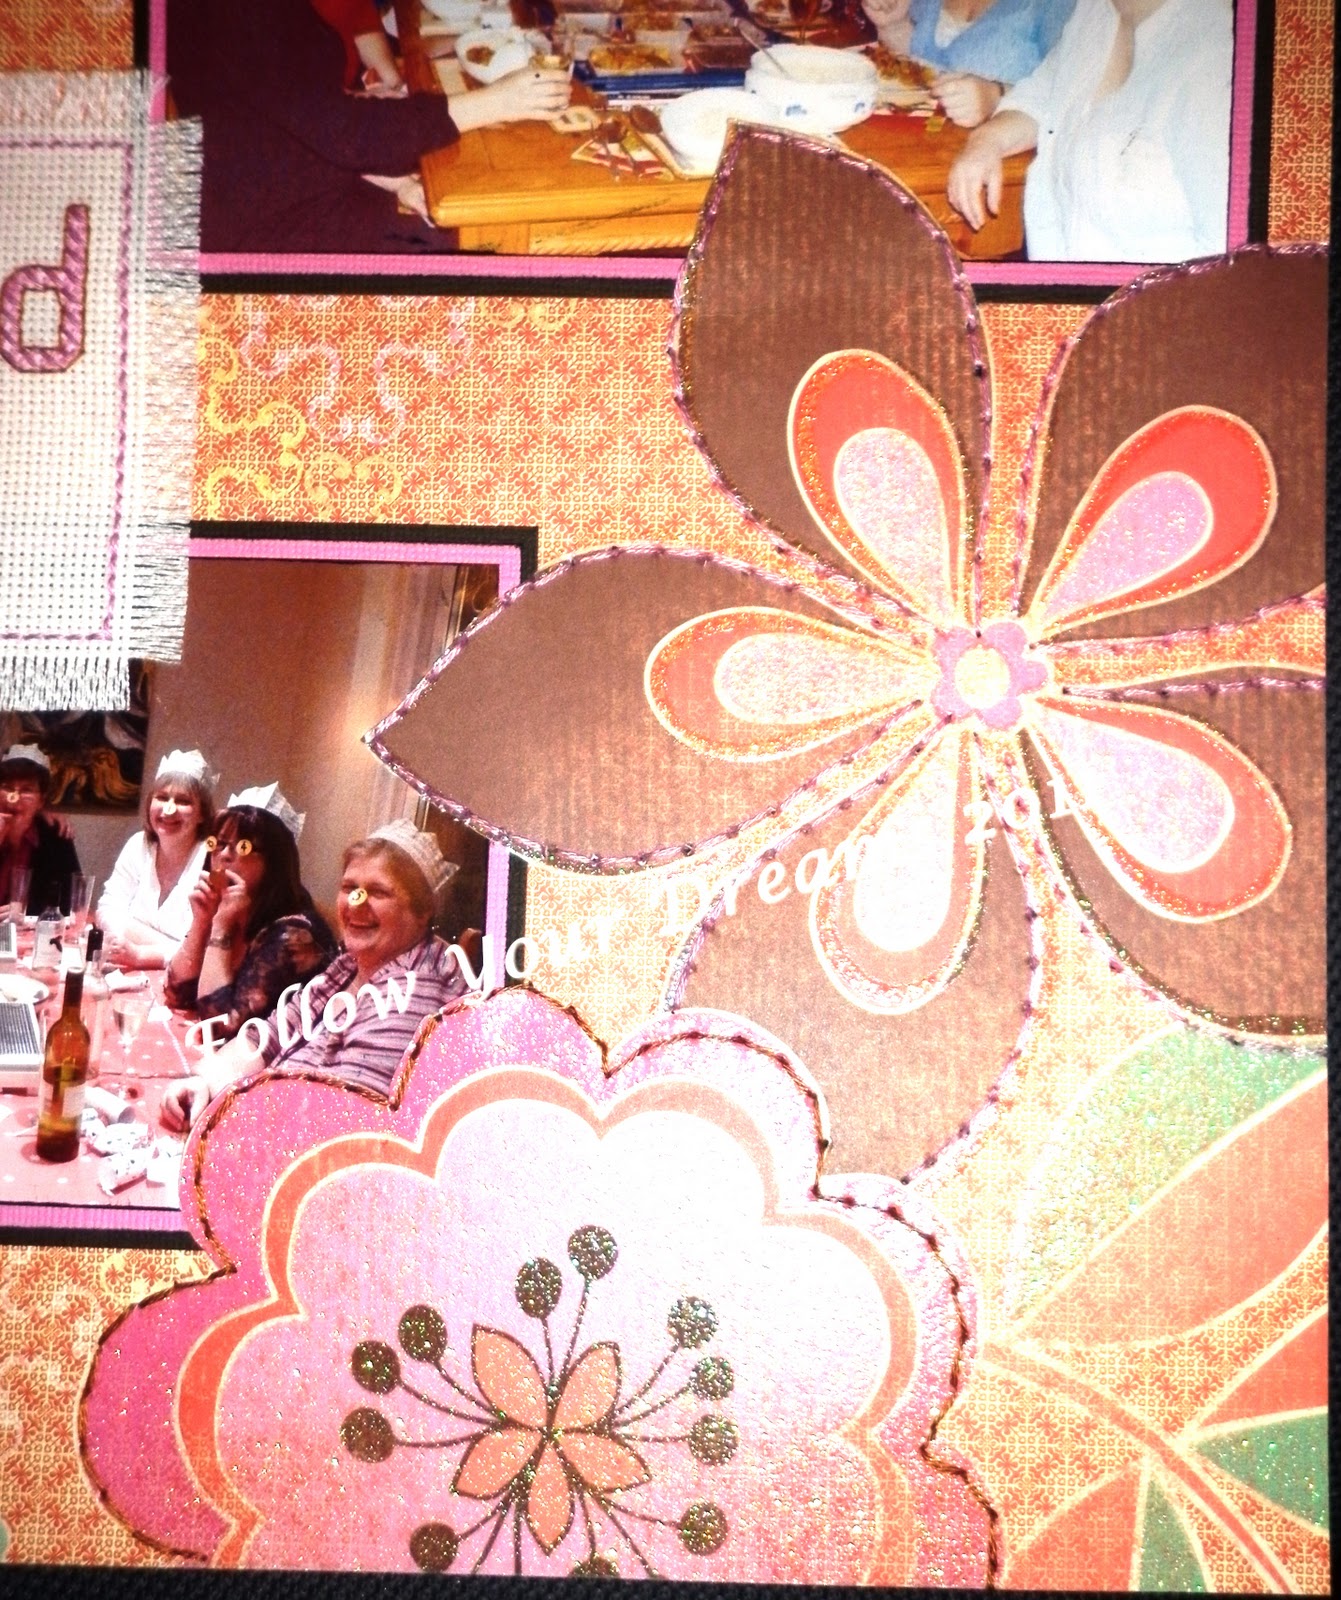
I cut around the flowers to overlap the photos - on the lower photo the flower is actually covering up an area where there were distracting areas on the photos (flare from lights)

tfl, and for any comments you may care to leave

So thrilled for my youngest

My youngest decided she wanted to try out for our town's Carnival Princess. She was so thrilled to be selected! She said she was asked if her room was tidy (what a joke!), so she told them it was "a work in progress"! Ummm, yes, I think good  intentions are there, but it's a perpetual work in progress as something else always prevents her getting it finished. lol
Oh, in case you wondered, my daughter is the one on the right in the stripy top

tfl, & for any comments you may care to leave

Sunday 20 March 2011

Box Card

Last Sunday I went to Bristol for a craft day spent with other crafters, organised by playingwith paper who I got to know through the DoCrafts forum. We had a fabulous day, with lots of laughter as well as creativity, and it was great to put some faces to names. We all worked on the same project, but every one of them was so different, and some of them were such amazing works of art, I came away so inpsired. This is my effort.
I couldn't post this before as it was for a friend's birthday, but since I gave it to her yesterday here it is.
Mo Manning image coloured with Promarkers
Tea House papers by DoveCraft
Papermania card for mats
Edges inked with Distress Ink
Gardenia from Wild Orchid Crafts
Leaves punched with Martha Stewart punch
Ribbon from stash 
Tag cut & trimmed with guillotine, edges rounded with scissors
I should have taken pictures from the side as it doesn't look very obvious that the flowers are in an area which looks like the cut away section inside a book
I bought these papers on Saturday & decided to use them on Sunday.
On Sunday evening, my friend had asked us to make some cupcakes for her party celebrations, what a coincidence that I had used these papers, not realising how appropriate they would be!
Flowers from Joanna Sheen
This is the box I presented the box card in. I had intended making a presentation box, but then found a very sturdy box at work which had held a testicular implant! - I was thrilled to find it was the exact size for what I wanted but decided it would look much better covered (& to disguise what it had once held - though it amused my friend to hear what had been in it!)

Tfl, & also for any comments you may care to leave.

Saturday 12 March 2011

Coloured in vellum

Wallet card made for a DC swap
I decided to play around & coloured some floral vellum on the back with Promarkers. I liked the effect from it, the colour shows through subtly, but with the sparkle from the vellum, it's very pretty. I teamed it with this floral paper (think it's from an old Dovecraft pack), & card from my stash. Sentiment heat embossed & cut out using SU punches
Tfl, & for any comments you may care to leave

Wednesday 9 March 2011

The girls are in town

I have joined a monthly scrapbooking club, & we were set the challenge of using the kit we had with a page map which Jo had given us. I rotated the map 90degrees and came up with this. 
I used a photo taken some years back, but thought it would suit the layout. I loved the way Jo had used the ribbon in her layout, so shamelessly copied it. I had also debated using a different photo taken on the same evening, & I now think that the ribbon also resembles the covering on a covered settlers wagon. The cream & black paper used at the bottom of the page also seems to resemble the time of the "old west".

SU papers, brad, stamp, chipboard letters & ribbon used.
Cricut used to cut the shapes, including the Sheriff's badge (now think I should have cut it in silver instead of gold mirri board). Papermania card used for the cowboy boot.
EK success punch used for rope effect


Chipboard letters coloured with black Promarker
Lettering kindly done by my eldest (her writing is neater than mine). I gave her free rein with it, & she came up with the idea of doing the lettering so it looked like a bullet hole at various points along the font. She wrote it in pencil which I went over with a Promarker fine liner
I'm glad I did it, it's turned out to be a fun page & captures the fun my youngest two had that evening.

Tfl, & for any comments you may care to leave.

Monday 7 March 2011

Lattice front Christening card for Toby

This is the card I made for Toby from my family
Thr front part of the card is made using a SCAL design purchased from Playingwithpaper,
which was then cut with the Cricut
Forever Friends image stamped, heat embossed & coloured with Promarkers, then cut with nesties, edges inked, matted onto baby blue card (which Toby's Mum is very fond of), & edges inked again.
Details printed using pc
I decided to use a second FF Christening image to hide the dark area where the mat is on the other side of the card insert. I don't remember where I found the verse, but it is my favourite verse for a Christening.
I also made a candle to match the card (the vicar asked if I brought my own candle in case they had run out!)

Toby's parents loved the card. We had such a wonderful day with them, their families & friends, & were honoured to share such a special day with them all. It was also great to be able to put faces to names.

Tfl, & for any comments you may care to leave.

Sunday 6 March 2011

Toby

Today was the Christening of a very good friend's baby son, and she asked me to make a card for her & her partner to give their son. This is the design she chose. The colours do not show as true here, but they are beige & gold to match the outfit he wore today.
I designed the card using SCAL, and used my Cricut to cut it out. I liked the way the "i" looks a little like a candle in this font, which I think is especially symbolic for a Christening. I am not happy with the size of the "i"s & "n"s, & don't know what happened there, but it's still early days for me with learning how to use SCAL
Close ups of the Cross & Candle I used on the front of the card.
My friend & her partner were really pleased with the card, & then my friend wrote a beautiful poem for the inside of the card.

We had a wonderful day with them, & their families.

Wishing you a lifetime of  love, health & happiness Toby xx

Tfl, & for any comments you may care to make